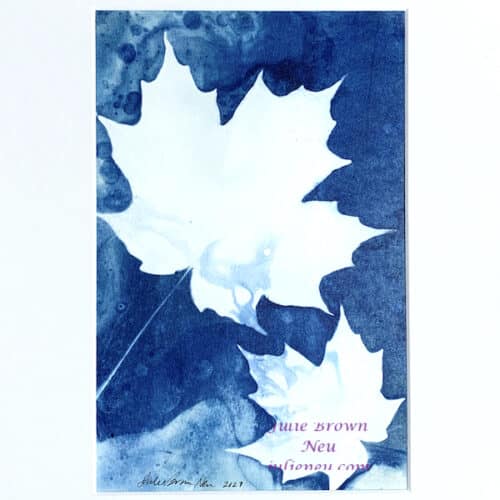
I’ll be sharing this tutorial at my guild meeting next week (Rising Star Quilters), but here’s a sneak peek. (The original thread painting is currently available from the Francesca Anderson Fine Art Gallery.)
Why Thread Painted Photos?
- A photo gives you a place to start. You don’t have to create a design first, but can just print and sew.
- Photos are forgiving. If you don’t completely cover an area with thread, the color from the photo will show through and that’s okay!
- It’s a fun way to embellish some favorite photos.
Supplies Needed:
- Digital photo
- Fabric printing sheets (e.g. EQ Printables)
- Plain printer paper
- Heavyweight stabilizer (e.g. Pellon Peltex)
- Pencil, pen, fabric marking pencil
- Matching threads (up to 5 colors)
- Sewing machine with free motion foot & lowered feed dogs
- Thread snips
- Good light
- Backing fabric, border fabric (Optional)
Getting Started – Printing Photos
- .Use whatever program you normally use to edit photos and arrange them on a page the way you want them. (I spent decades as a management consultant so I dream in PowerPoint and that’s what I use.)
- Print a copy of the photo onto plain paper. (This can be your test copy to make sure you know which side is up when you load your paper. Mark one side “Front,” put the paper in the way you think it goes and see if the photos come out on the front side.)
- Load the fabric sheet properly into the printer and press “Print.”

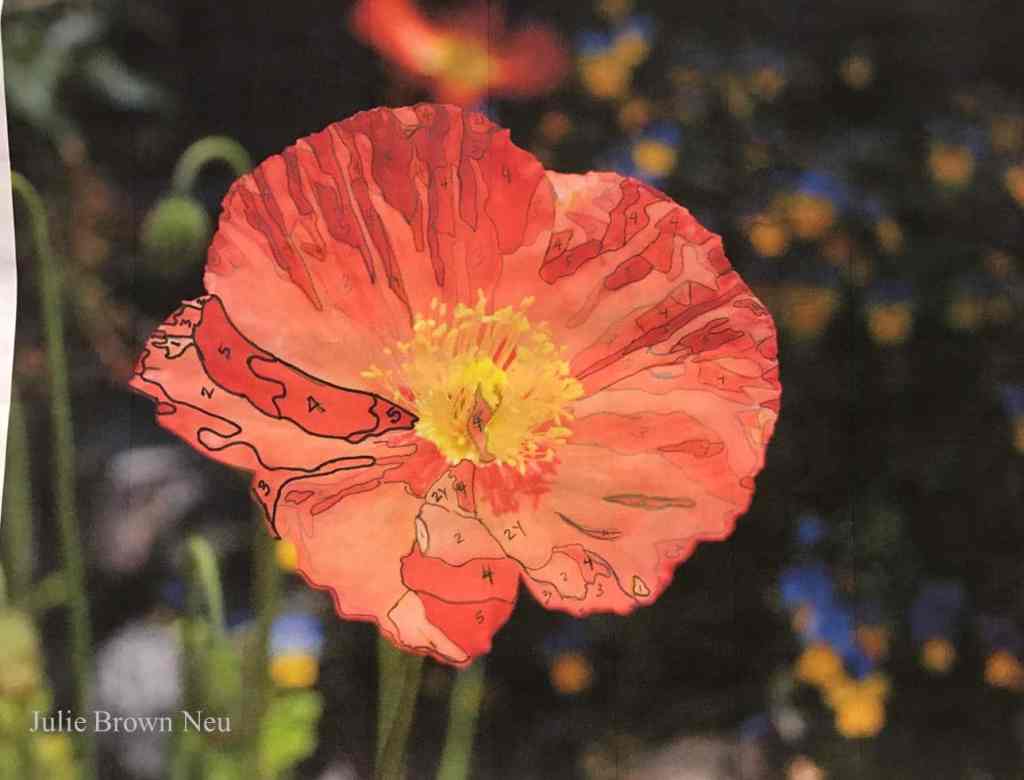
Marking the Printing Area
The next step is to decide which areas you will thread paint and what the colors will be. It would be easy to select 20 thread colors to distinguish among all of the many shades of color that appear in your photo, but it is completely unnecessary. Five colors are the most that you will need to give your photo dimension. You also don’t need to do any stitching in the background; The main image in your photo will stand out more and you’ll finish faster too!
- Use a pen or pencil and the paper copy of your photo.
- Find the darkest sections of color and draw their borders. Mark these sections #5.
- Find the lightest sections of color and draw their borders. Mark these sections #1.
- Draw borders around the other areas, labeling them #2 – 4 from light to dark.
It’s not important to make this perfect. No one will have your map to know what should have been where and your image will still turn out great if your thread painting isn’t perfectly matched to the photo.
Choosing Threads and Painting
Now, the fun begins! Drop the feed dogs on your machine, stabilize your photo, and paint!
Using your marked paper photo as a color guide, select five colors of thread to match the sections you marked. Again, the color match doesn’t have to be exact. Focus more on value than color.

- Drop the feed dogs on your machine and put on the free motion foot
- .Load the darkest color thread (#5) onto your machine. (If you have lots of bobbins, you can load a matching bobbin. You can also just use the #3 color in your bobbin for all of the threads.)
- Remove the backing from your fabric photo and layer it over the heavyweight stabilizer. If you’re using a larger photo, you may want to use a little basting spray. You may use a piece of plain fabric for a backing, though this is not necessary if you plan to frame your finished work.)
- Using a chalk pencil or other marking pen, outline all of the #5 areas on your fabric photo. (Yes, you can use a regular pencil or pen because you will cover it.)

- Bring your stabilized fabric photo to the machine and drop your needle into one of the marked sections.
- Make small back and forth stitches like you’re using a colored pencil to fill in the marked area with thread.
- Continue making small back and forth stitches until the area is filled. Pull your photo from the machine, snip your threads, and move to the next section. Keep painting until all of the #5 sections are colored.
- Load the #4 thread into your machine, mark those sections on your photo and paint.
- In many cases, the boundaries between colors will not be hard edges, but will need to be blended to soften the edge. To blend, overlap some of the darker stitches you already made with lighter stitches, making the same small back and forth stitches. This is the same technique to use if you want to mix colors.
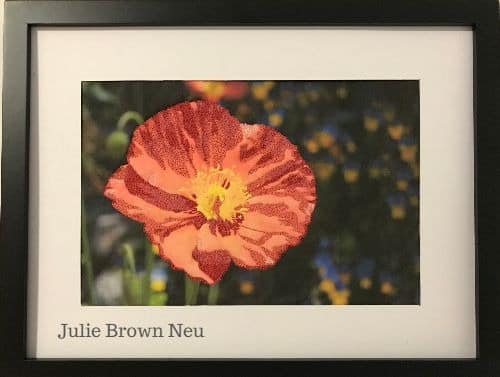
- Some areas of this poppy had a bit of yellow so to achieve that, I first loosely stitched some yellow threads in that section and then came back over top of it with some loosely stitched pink thread. (By “loose” I don’t mean that the thread tension was loose, but that I didn’t stitch densely.)
- Keep marking sections and changing threads until you’ve finished filling in all of the #1 areas.
- Then, add borders or put your finished thread painting in a frame and enjoy!